Disclosure: This post may contain affiliate links, meaning I get a commission if you decide to make a purchase through my links, at no extra cost to you. As an Amazon Associate, I earn from qualifying purchases.
You’ve fallen in love with homemade Neapolitan-style pizza. That light, airy, blistered crust is pure magic. But sometimes, especially with those super thin centers, loading up all your toppings can lead to a soggy middle or a struggle to transfer it into the hot oven. If you’ve ever dreamt of a perfectly crisp, sturdy base that still has that classic Neapolitan chew, the answer might just be to prebake your pizza dough.
For detailed guides on making your perfect Neapolitan pizza dough (with or without poolish), check out our recipes.
The Challenge with Thin Neapolitan Pizza
“Prebake?!” you might ask, “Isn’t that cheating?” Absolutely not! While true Neapolitan pizza is typically baked in one go at extremely high temperatures, you can use prebaking (or blind baking) as a fantastic technique for home ovens, especially when you want extra insurance against sogginess, especially with wetter toppings. It’s a game-changer for achieving that ideal balance of crispness and tenderness.
Let’s dive into why you might want to prebake, and exactly how to do it for a flawless Neapolitan-style crust.
Why Prebake Your Neapolitan-Style Dough?
Even with a super hot oven and a pizza stone or steel, sometimes a few challenges pop up with thin crusts when you don’t prebake pizza dough first:
- Avoid the dreaded Soggy Middle Syndrome: This is the big one. If your dough is too thin or your toppings are a bit watery, the center can struggle to cook through, resulting in a floppy, unappetizing middle.
- Launching Difficulties: You might find it notoriously hard to launch a very thin, raw dough from your peel into the oven without deforming or sticking. Prebaking gives it structure.
- Even Cooking: Prebaking allows the base to start firming up and browning before the weight and moisture of the toppings get involved, ensuring an even bake from edge to center.
- Batch Cooking (Optional): If you’re hosting a pizza party, you can prebake multiple crusts ahead of time, then just top and finish them quickly when guests arrive.
Step-by-Step Guide:
- Preheat Your Oven & Stone/Steel (Crucial!): This step is non-negotiable. Get your oven as hot as it can go (ideally 230-260°C / 450-500°F or higher), with your pizza stone or steel inside, for at least 45-60 minutes. You need to make sure the surface is scorching hot.
- Stretch Your Dough: Gently stretch your dough ball into your desired thin crust. For Neapolitan style, focus on keeping the rim (cornicione) airy and the center very thin.
- Prep the Peel & Sauce the Base: Lightly dust your pizza peel with semolina flour, transfer your stretched dough onto it, and quickly ladle on a thin, even layer of your tomato sauce.
- Launch & Prebake: Slide the raw dough directly onto the screaming hot pizza stone or steel in your oven.
- For a thin Neapolitan-style crust, prebake for only 2 -3 minutes.
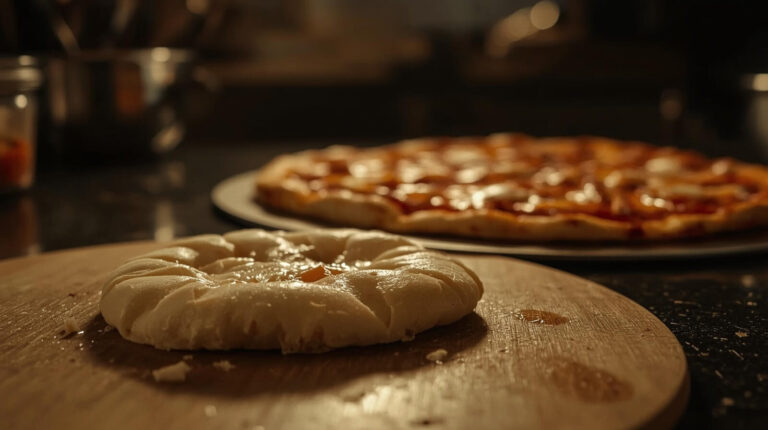
- You’re looking for the edges to puff up slightly, and start firming up, and the bottom to show just a hint of color, but not to be fully cooked or browned. It should still be soft and pliable, but hold its shape.
- Remove & Top: Carefully pull the partially baked crust out using your peel. Transfer it to a work surface or cooling rack, add your fresh mozzarella, basil, a drizzle of olive oil, and your preferred toppings (don’t overload it).
Brush a light touch of olive oil over the raised rim (cornicione) for a golden finish. - Final Bake: Launch your topped, prebaked pizza back onto the hot stone/steel in your oven. Finish baking until the cheese is melted and bubbling, the crust is beautifully charred and golden, and the bottom is crisp (typically another 3-4 minutes, depending on your oven).
Tips for Success
- Don’t Over-Prebake: The key is partial cooking. If you prebake for too long, your crust will become too dry and cracker-like, losing that desired Neapolitan chew.
- Work Fast: Once the dough is stretched, move quickly to get it onto the peel and into the oven.
- Keep it Thin: This technique is most effective for truly thin crusts that might otherwise get soggy.
- Practice Makes Perfect: Your exact prebake time will depend on your oven’s temperature and your preferred final crispness. Experiment a little!
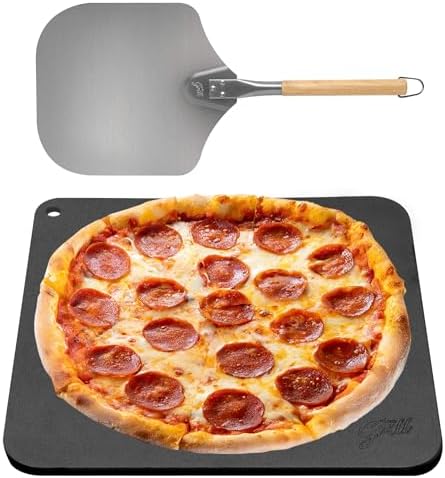
Tools Mentioned in This Post


Frequently Asked Questions
When done correctly with a hot stone or steel, a short prebake gives you the structural stability needed for a home oven while keeping the airy, chewy cornicione (rim) intact.
Expect the prebake to take about 2 to 3 minutes depending on your oven’s exact temperature and stone heat. You want the base to firm up structurally and the sauce to set slightly without fully browning or drying out like a cracker.
The cheese and remaining toppings go on after the initial 2–3 minute prebake. You pull the sauced crust out of the oven briefly, add your toppings, and return the pizza to the oven for the final melt and crisp.
Adding the sauce before the initial prebake weighs down the center naturally, preventing unwanted bubbling in a home oven, while protecting the thin dough from drying out prematurely while the base sets.
Final Slice
Prebaking your pizza dough for a thin Neapolitan crust isn’t just a workaround; it’s a legitimate technique that can dramatically improve the final texture of your homemade pizzas, especially in a home oven. It solves the dreaded soggy bottom and makes launching a breeze, giving you confidence and consistently delicious results.
So, go ahead, give this “secret weapon” a try. Your next perfect pizza is waiting!